Painting or repainting an airsoft gun can be an easy way to improve their appearance.
Maybe it’s gotten a bit scuffed and scratched over the years or maybe the paint and finish are starting to fade.
Or maybe you’re simply looking for a tactical look that will look cool or help your gun blend into an environment.
Now, painting an airsoft weapon might seem like it’d be a bit difficult and you might figure that you need quite a bit of artistic skill and experience to do a proper job.
The reality is that giving your gun a fresh new coat is often nowhere near as hard as you think, and to help out we’ll go over some of the basics.
Why Paint Your Airsoft Gun?
As we all know, airsoft guns are given a coat of paint from the factory or (in the case of plastic models) made from colored polymers, meaning they usually come out of the box in realistic colors and patterns.
The question becomes, then, why spend time and money trying to fix what isn’t broken?
Ultimately, there are a number of good, solid reasons you might choose to repaint your airsoft weapon.
Repairing Scratches, Discoloration and Other Damage
Airsoft can be a very active sport, and one that can be very tough on equipment.
Even in the hands of careful players, weapons get dragged, dropped, scraped, and, well, shot.
Some damage to the weapon’s appearance is basically inevitable and a fresh coat of paint can often cover up minor scratches, scrapes, dings and dents.
Another issue that paint can help with is with cheap finishing or materials.
Some airsoft guns that are modeled after dark black or blued firearms can come off looking dull, pale or otherwise unrealistic.
This is often true with plastic airsoft guns, where a lot depends on the type and quality of ABS plastic beads used, but can also be true of entry-level metal airsoft guns, where companies may save a bit (or a lot) of money on the finish.
In either event, you can often drastically improve the look of a gun, whether old, damaged or cheap, with nothing but a good lick of paint.
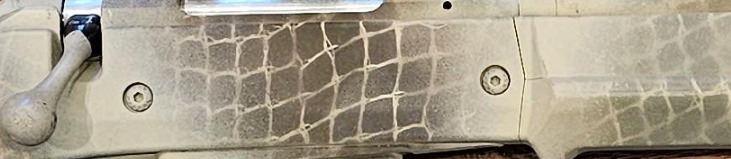
Camouflage and Other Tactical Considerations
While they certainly look cool, a basic black or metallic airsoft gun can stick out like a sore thumb in certain environments, such as a woody or sandy area.
While some airsoft guns can come in camo, their realism and quality can often be more hit than miss, and some can simply look hideous right out of the box.
Giving your gun a coat or so of paint, taking your time to give it some proper highlights, detail and contrasts, can be a transformative experience that can improve your stealth and help make sure that your primary better blends into the environment.

Team Solidarity
Some airsoft teams have a specific color pattern that they use to identify themselves on the field.
If you and your teammates extend that to include color-coordinated weapons, it can really be a boost to team spirit and cohesion.
Plus, it can make for an intimidating first impression.
Personal Expression
Let’s face it, sometimes you don’t want a weapon that looks just like everyone else’s.
Sometimes you want a weapon that makes a statement, either about you or your interests.
Maybe that means a special symbol painted on the receiver, maybe it means painting your gun in a wild pattern or maybe it’s modding the entire gun to replicate the look from a video game, movie or anime.
You could shop for hours and spend who knows how much to find one that fits your image or you could just take your favorite weapon and paint the design you desire.
Painting Your Airsoft Gun
Now that we’ve discussed a few of the reasons why you might choose to repaint your airsoft guns, let’s get into the how of it.
Step 1: Set Up Your Work Area
Let’s kick things off by setting up a space where your masterpiece can come to life.
Find an area that is well-ventilated – paint fumes are no joke and you don’t want to end up in the hospital just to give your carbine a shiny new look.
You’ll also need a place with plenty of light in order to make sure you can see what you’re doing and for the best chances of making sure that the color you’re using is close to what you want.
The best source of light for painting an airsoft gun is one that mimics natural sunlight (what painters call full-spectrum light), as this will give you the best approximation of what your gun will ultimately look like when you take it to the field.
In general, LED light bulbs tend to be the best at this and they tend to have a 0-100 Color Rendering Index (CRI), which is a rough idea of how colors would look in natural light.
CRI is usually indicated somewhere on the front or sides of your lightbulb box, although you might have to look around for it since it isn’t exactly something most people are on the look out for.

If you can, try and fit your workspace with bulbs that have at least 80 CRI.
If you’re feeling adventurous and want to work outdoors, check the weather forecast. No one wants their paint job ruined by unexpected rain, and excessive humidity will make the drying process take much longer.
One last tip for your work area:
Before you start painting, lay down some tarp, cardboard or plastic on the ground around you.
It’ll make cleaning up after much easier, and if you’re working outdoors it’s better for the environment.
Mother Nature is already very colorful, she doesn’t need our help.
Step 2: Planning Your Painting
Like any other project, it’s important to not just try to wing your paint job- that’s a great way to wind up with a muddled mess.
Planning is key.
First, take a look at your airsoft gun and carefully consider what it is you’re trying to do with your paint job.
If you’re just touching up some scratches, make sure you mark them first to be sure you don’t miss any.
If you’re making a camouflage pattern, consider printing out some examples of real steel camouflaged weapons as an inspiration and painting guide.
Also consider what colors you’re going to use based on what your usual play environment is like.
If you play in forests and fields, then you want to use greens (like woodland or OD green), blacks and browns, if you play in urban style fields then grays and blacks might be preferred, while if you like to hang around the sandbox, consider tans, browns and blacks (think “flat dark earth” – FDE).
For very complex camo designs, or if you don’t feel your spray painting chops are up to it, consider hydro dipping your gun.
This is where a pre-printed, usually complex pattern or design is printed on custom material, laid over a pool of water or other airsoft gun-safe liquid.
The treated gun is then lowered into the pool, where the design sticks to its surface and a clear coat is later applied.
While potentially expensive and time consuming (usually having a turn around time of about a week or so), this can give your airsoft gun an extremely cool look that would be all but impossible to do by hand.
Where things get a bit tricky is if you’re going for a unique, personalized look.
In this instance, planning is even more important.
Decide exactly what you want each part of your weapon to look like, and maybe even mark individual parts just to avoid any confusion.
For complex spot decorations, such as custom logos or images, consider picking up some custom adhesive stencil papers.
These are translucent vinyl sheets upon which a design can be printed using a home printer.
After cutting out all the parts you want to paint, the design can be cut and peeled off the sheet and stuck directly to the gun, where a quick spray or paint will create the design.
Step 3: Pick Your Paint
You can’t just grab any old can of paint and start slapping it on.
Well, you can, but it’s probably going to look awful.
You’re going to want to use spray paint for airsoft weapons- it’s just much faster and easier than doing things with brushes and won’t leave brush marks and strokes on the gun.
But that still leaves you with a huge range of choices.
Choosing the right paint is like picking the perfect weapon for an airsoft game – you have to pick the right tool for the right job.
Here are a few key factors we found helpful when it came to picking the right paint.
Durability
Airsoft isn’t a gentle sport.
Equipment can expect to take at least a couple of knocks and scrapes per game, so you’re going to need paint that won’t scratch or wear too easily.
Adhesion
The paint should adhere well to the surface of your weapon, so that your paint scheme lasts longer.
Make sure you pick the right paint for the right material- airsoft guns come in plastic and metal, and certain types of paints do better with certain material.
Ease of Use
Truth is some paints need more work than others.
Acrylic paint is what most people will use and comes in a vast array of colors, which can easily be mixed, but may require a primer if applied to plastic.
Technical and tactical considerations
Keep in mind you’ll be taking your airsoft gun to the field and you don’t want your paint job to make you too obvious a target or be too annoying to you and those around you.
Generally speaking you’re going to want to go with super matte or ultra flat, that won’t reflect too much in the sun.
With all that said, to get you started, here are a couple of paints we found to be especially good for airsoft.
Krylon Fusion For Plastic
Especially made for plastic surfaces- and there’s a lot of plastic in airsoft – Krylon Fusion has very good adhesion and durability in our experience.
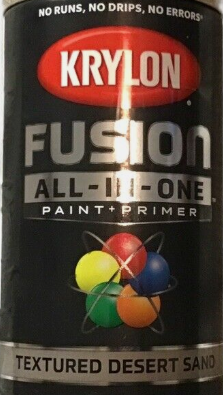
This is paint that will last a long time, even through rough handling. Krylon is a popular brand among airsoft modders for a reason – it’s reliable and works well.
Montana Gold Acrylic
Montana acrylics offer beautiful vibrant colors with a matte finish, which will really make your weapons look their best without any undue shine.
Montana often uses a quick drying formula that makes painting go a lot easier, even if you’ll need primer for plastic guns.
Like Krylon, the paint is quite durable and are actually UV-resistant, which makes them less likely to fade or bleach in strong sun.
Duracoat Aerosol Firearm Finish
As you can probably guess from the name, this brand is made for use with real firearms.
It is, however, still fantastic for metal airsoft weapons, and is maybe even the best paint we’ve seen for all metal builds, particularly for aluminum and steel-heavy models.
Renowned for its toughness, as you might expect, this paint can hold up to the roughest of rough treatment but can be a bit more expensive than some other options.
Step 2: Clean Your Gun
Before you do anything, make sure you clean your airsoft gun’s externals thoroughly.
For one thing, dirt, dust, grease and debris will all prevent paint from sticking and drying properly to your gun, ruining your work.
Secondly, cleaning your gun will reveal any scratches or dings that you may not have been aware of and that may have been covered up until now, something that you will have to figure into your planning.
Taking a soft, damp cloth, carefully wipe the external area of your airsoft gun, making sure you get into all the nooks and crannies you can.
There’s usually no need for any harsh cleaning products (which can further damage the gun), and abstain from applying any oil or treatment to the gun afterwards, as you’ll be painting the surface.
Depending on your preferences, and particularly if you have an airsoft gun with a plastic receiver, you might want to gently sand it as well with a fine grit sandpaper (we’d suggest starting with 6-800 or so and working your way up if needed), both to remove any lingering debris and/or surface scratches and as a way of helping prep the surface so that your paint will better adhere to it.
Step 5: Disassemble Your Gun
Before painting it’s important to take down your gun and remove any parts or accessories you don’t want painted (wood furniture springs instantly to mind).
Big things like optics and underslung launchers might be worth leaving on as they’re large enough to look strange if they’re a different color from the rest of the weapon.
Also, consider taking out internals like the gearbox and hop-up to avoid any paint-related disasters.
While this may be a little bit time-consuming, if paint gets into any of the working parts you’ll have a real problem on your hands.
Step 6: Tape
Tape is your defense against accidental paint damage.
Make sure you cover all switches, lenses, ejector ports, and anything else you want to keep paint-free and…well, usable.
Use tape that peels off easily, like painter’s tape or masking tape.
To prevent frustration later on, don’t pick anything too strong or that will leave a residue on your gun after peeling it off.
Step 7: Apply A Primer and Base Coat
All right, time to start the real painting!
The first thing you’ll need to do is lay your weapon on its side.
Don’t rush and proceed one side at a time.
If you try to cover the whole weapon in a single pass, you’re going to wind up with a patchy, uneven paint job.
You’ll probably need to apply a primer coat to your airsoft gun, which will both help cover up any pre-existing finishes or uneven wear and will help let the paint stick to certain surfaces, such as plastic.
Apply the primer to each side of your airsoft gun, one at a time, allowing it to dry properly before turning the gun over.
Next apply a base coat of your paint.
Short, controlled bursts are the name of the game, and a nice, even coat is the goal.
Keep your spray the same distance from the surface of your airsoft gun the whole time- about eight to twelve inches is best.
You’ll also want to keep the spray can at a 90 degree angle from your weapon.
All this is to ensure that you get that even coating of paint all over the weapon.
Once you’ve finished the first side, let it dry.
When it’s completely dry, flip the weapon over and start on the other side.
Remember, it has to be completely dry before you flip it, otherwise you’re going to ruin all your hard work.
Step 8: Apply Second Coat
Once the first coat is dry, you might be tempted to stop there.
Resist that temptation and apply a second coat.
Do it just the same as the first, and be sure to give everything lots of time to dry.
This isn’t just busywork or tradition- a second coat is very important.
A single coat will always be less durable than two- it will peel and scratch much more easily, and will likely fade sooner.
There’s also a better chance that the original colors will eventually bleed through a single coat.
A double coat ensures a long-lasting, good-looking paint job the first time.
Step 9: Finishing Touches
Now’s the time to fix any mistakes or touch up missed spots.
If you’re feeling ambitious, grab some fine brushes for the more intricate detail work.
For example, if you want to paint your trigger guard a different color than the rest of the weapon, spray paint may not be your best choice.
We know it’s been a lot of work, but keep taking things slowly.
One slip up now could be disastrous.
Step 10: Clear Coat
Once your paint is dry you’ll need to apply a clear coat on top of your work.
Clear coats act like protective sealant and will help protect your new paint job from scrapes and scratches as you use it.
Step 11: Reassembly
Reassemble your weapon, carefully peel off all that tape, and take a step back.
Take a deep breath and admire your work; you’ve just given your airsoft weapon a whole new look.
Pat yourself on the back for a job well done!
And that’s it – you now have a good idea on how to paint your own airsoft weapons.
So go out there and be creative!

David Lewis – A longtime airsoft and airgun enthusiast and collector, our editor David’s lifelong passion for tactical sports began in high school with some friends, a cheap knock-off airsoft M4, and an open field behind his parents’ house.
When he’s not plinking around, he enjoys sharing his knowledge of airsoft and helping those just starting out.